Table of Contents
How to operate
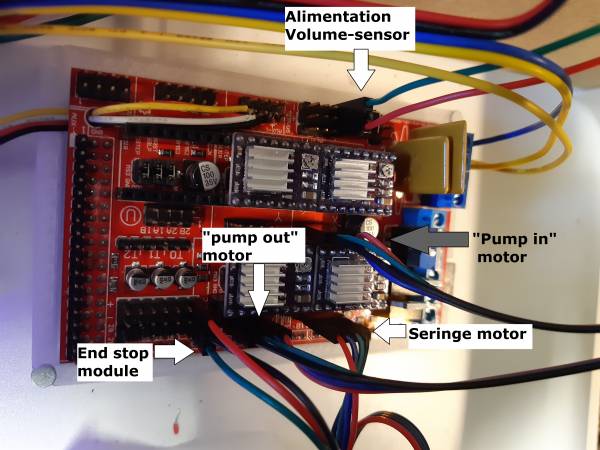
The first step is to check if all cables are connected to the right place : be careful to position the cables exactly and not to plug it backward ( it may cause a short-circuit).
For instance, the alimentation volume-sensor needs to be plugged correctly, the green cable in the upper pin and the red one in the bottom one.
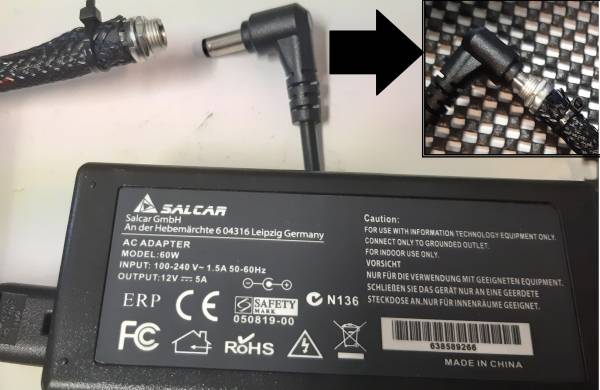
Once you made sure the connections are correctly plugged, you can plug the alimentation.
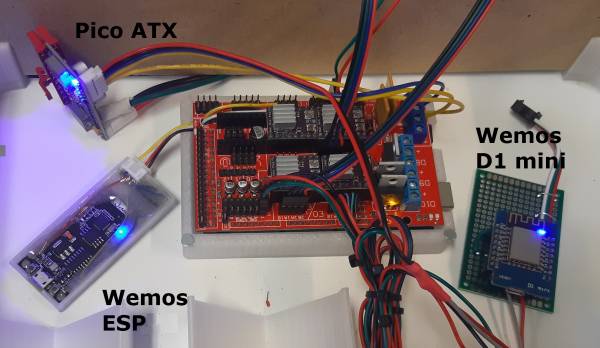
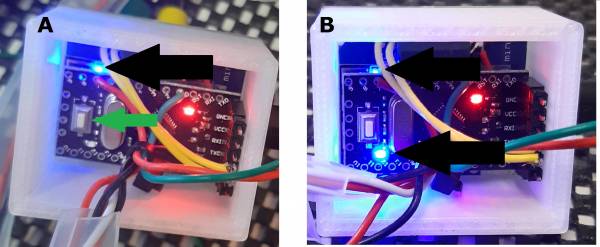
you should see the blue led of the following boards light up (as shown in the fig below) :
- The Wemos D1 mini : which will be used to control the lights for the culture and communicate with the broker( node-RED).
- Wemos ESP : which is used as a wifi board.
- pico ITX : which change the current.
If not try to unplug and replug the power supply or check the connections between the boards.
Installation of the pumps
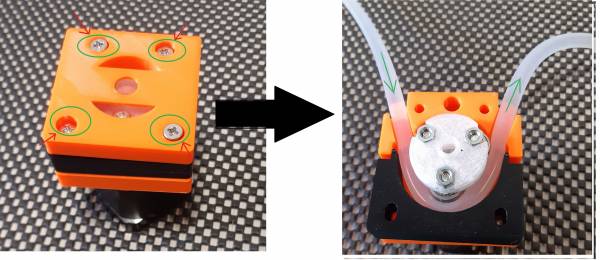
The first step is to open the pump by unscrewing the four screws placed on the bottom and place the tube between the ball bearings as shown below.
Calibration
Once the pumps are installed, you need to calibrate them. Each pump needs to be calibrated once. However, a recalibration is needed when changing the type and/or the length of the silicone tubing.
Step 1
Step 2
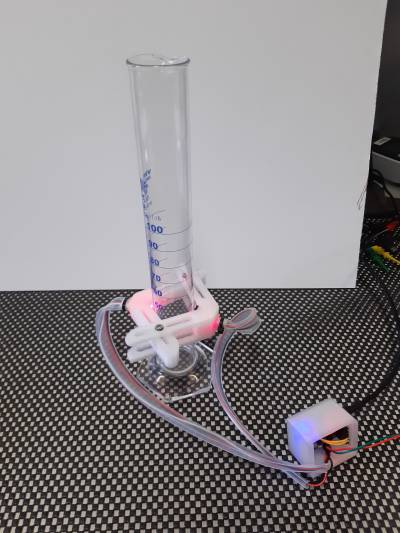
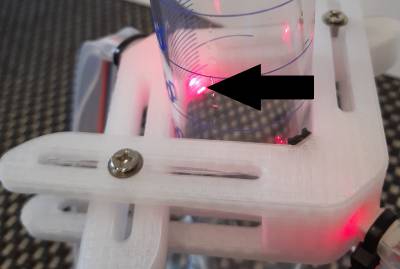
Set the laser in a desired volume (for instance 40mL). Be sure that the laser is pointing exactly on the 40mL line.
Step 3
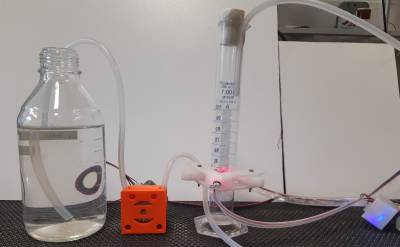
Set up a container of water connected to the correct end of the silicone tubing and the other end in the graduated cylinder with the sensor (make sure that the flow is set correctly: the ball bearings rotate counterclockwise).
Step 4
Before starting the calibration, make sure that only the first led on the wemos is turned (as shown in fig A). If the two led are turned on (as shown below in fig B), you need to press the reset button (pointed with a green arrow in fig A) to turn off the second led.
Step 5
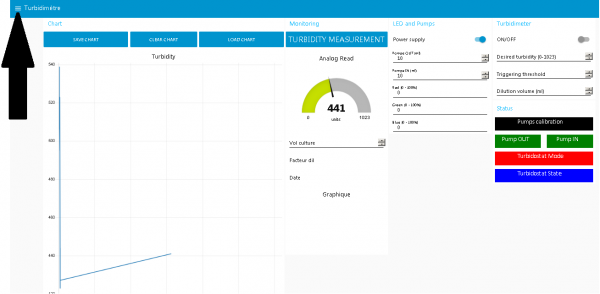
Once the volume for the sensor is set, you can open your browser and type “192.168.8.10:1880/ui/” (or the IP address of the node-RED) in the address bar. You should be redirected to this page (see figure below). At the right, the “Status” menu display the state of the pump. Green means the pumps are set, black that they're not calibrated, red that there is a malfunction and blue that they are currently working. You can also control the led intensity and pumping volume in the “ LED and Pumps” section.
Clic on the three bars pointed by the arrow to open up the menu and then clic on calibration.
Step 6
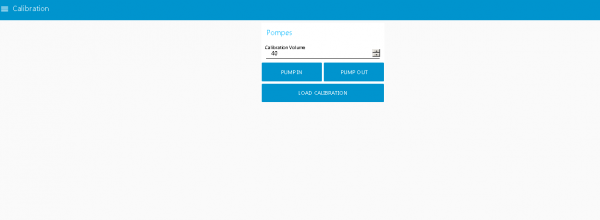
Write the calibration volume chosen in step 2 ( 40mL in our case) and clic on “pump in” (or “pump out”, depending on which pump you chose to calibrate first) to start the calibration.
Note: The parameters are saved in on your computer, if you didn't change the type and/or the lenght of the silicone tubing you can press the button “ load calibration” to load the previously saved setting.
The pump will start to pour water on the cylinder until it reaches the laser and the second led (shown in step 4 fig B) will turn on and the pump is set. Repeat the same step for the second pump and both will be set and ready to use.
- Make sure that the flow of water doen't touch the laser prematurely otherwise the calibration will be wrongly set and the second led will turn on before the meniscus of water reach the laser. In that case, press reset button (pointed with a green arrow in fig A) and repeat step 6.
- If you didn't set up correctly the silicone tubing in step 3, no water will be poured in the graduated cylinder and bubbles will start to appear in the container.
Extra step
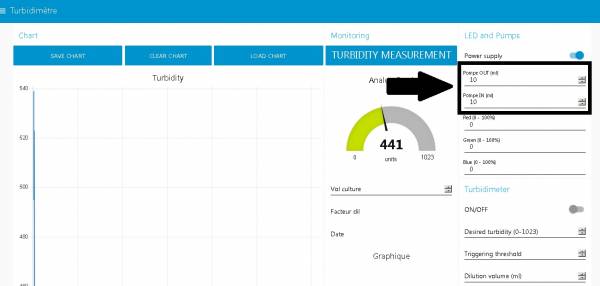
To be sure they're correctly set, it is advised to check if the calibration worked perfectly. To do so, go on the calibration menu in the section “ LED and Pumps” and write “ 10 ” in either “pompe in” or “pompe out” (depending on which pump you're calibrating). And measure the real volume pumped. If the volumed pumped doesn't match, redo the calibration for the pump.
Setup the phototurbidostat
After the calibration of the pumps, your phototurbidostat is ready to be setup.
Step 1
Step 2
Step 3
You can set the desired led intensity in the Node-RED dashboard by clicking on the three bars on the upper left and clicking on “ turbidimètre” then in the “LED and Pumps” you can set the desired red green and blue intensity.
Note: do not let the led on 100 % for too long.
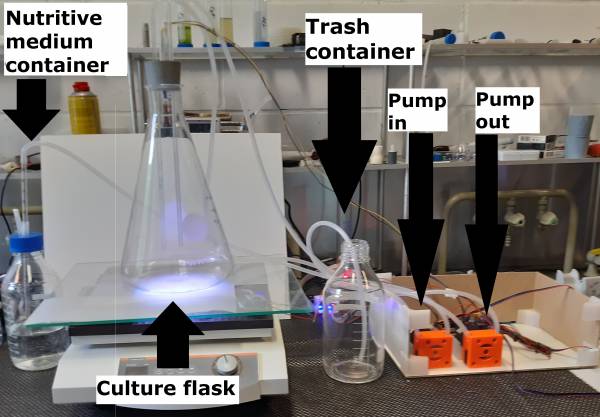
After this step your global setup should look like this:
With :
-The “pump in” pump connected to the nutritive medium container and the culture flask.
-The “pump out” pump connected to the culture flask and the trash container.
Extra step
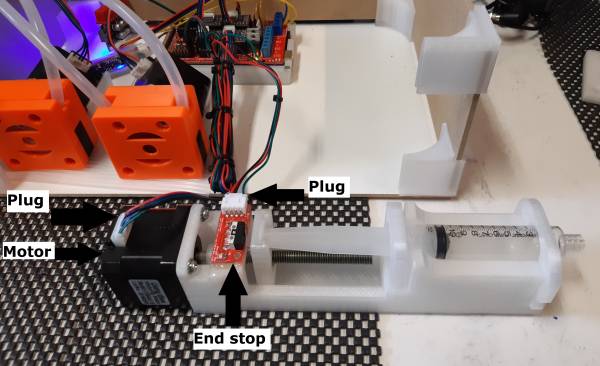
You can connect a seringe, if needed to the photobioreactor by plugging two plugs : one for the motor and one for the end stop module as seen below.
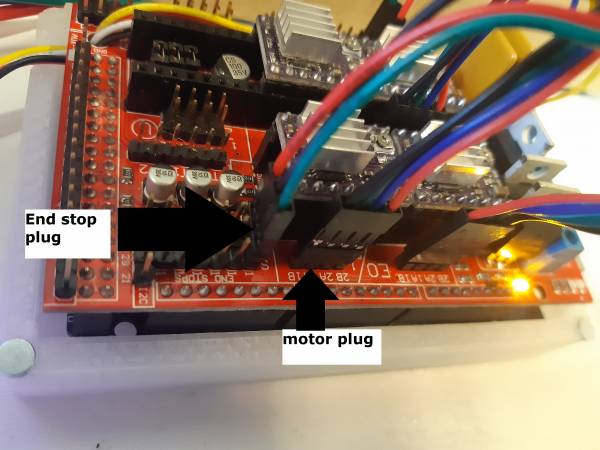
you then need to connect the plugs to the arduino shield as shown below
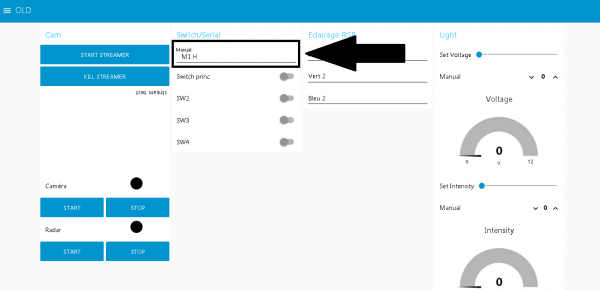
Once everything is conencted you can go to the Node-RED dashboard, click on the three bars on the upper right and go on the menu “ old”
First write “ M1 H ” on Switch/Serial section to calibrate the seringe
Then write M1 + number of turn you want, for instance you can write “ M1 10 ” to make the motor of the seringe do 10 turns.
Note : you can convert the number of turns done by the motor in mL by simply measuring how many mL 10 turns do and then simply do a rule of three to convert it in mL

